Tuesday, August 31, 2010

Max Nailpolish review

Deze grappige lakjes kwam ik laatst ergens tegen, dus tijd voor een review! Ik was zelf zeer benieuwd naar of deze lakjes wel serieus te gebruiken waren aangezien de prijs erg goedkoop is €0,45 per lakje. Een voordeel is al dat de lakjes in ieder geval een naam hebben, dus te herkennen zijn (bah heb een hekel aan lakjes zonder naam en zonder nummer, raak ze zo kwijt in mn stash dat ik ze dan nooit gebruik). Goed de review!

When I was at a local store, I saw these funny polishes, so reviewingtime! I was really curious if these polishes were really polishes to use, because they were supercheap: €0.45 p. polish. A big profit is that the polishes have names, so they're recognicable (I really hate polishes without names and numbers, I always lose them in my stash, and never use them again). Alright the review!

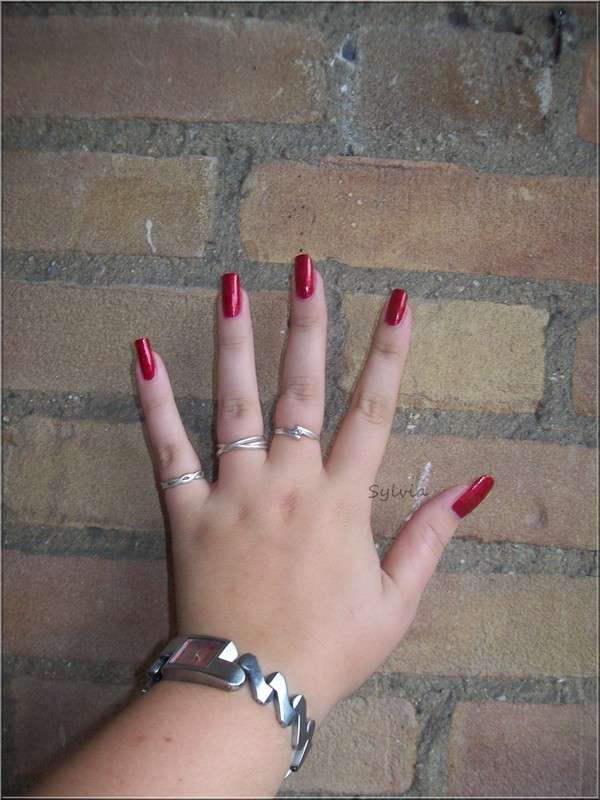
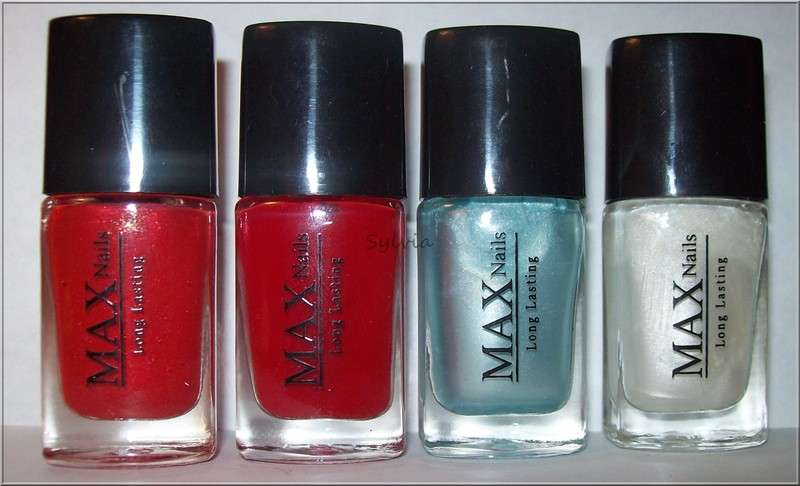
Van links naar rechts: Rose Red, Riviera Red, Blue Pearl en Pearl
From left to right: Rose Red, Riviera Red, Blue Pearl and Pearl

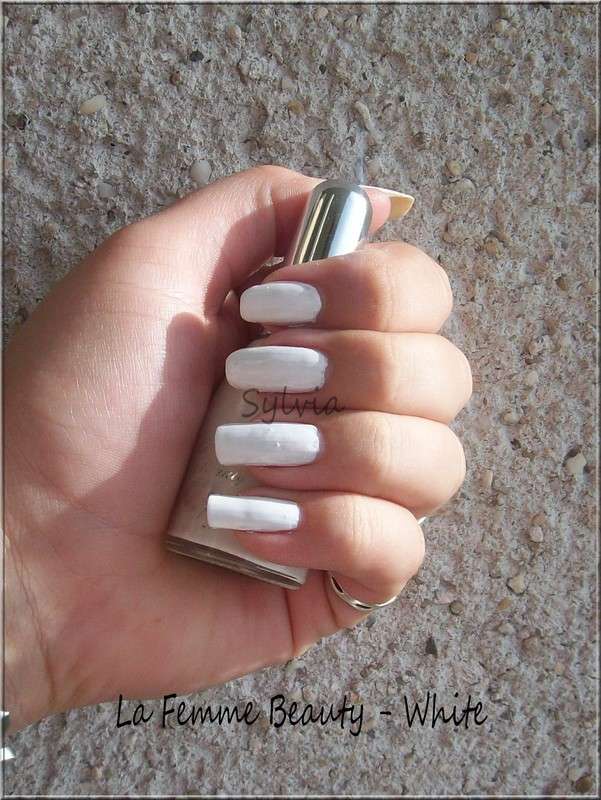
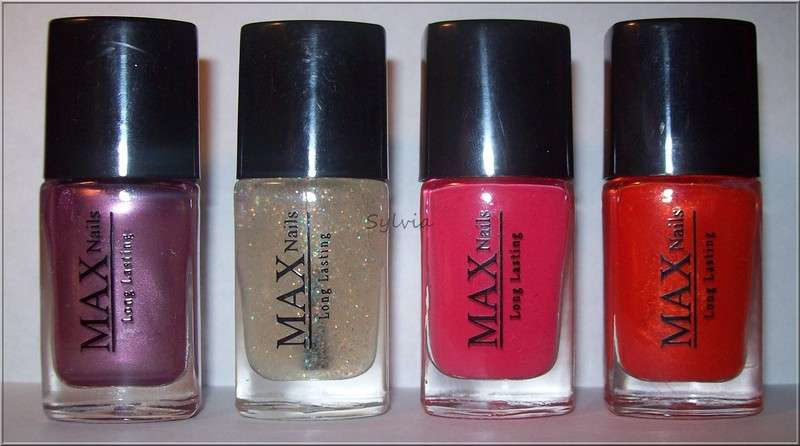
Van links naar rechts: Light Purple, Diamond Sky, Peach en Coral Red.
From left to right: Light Purple, Diamond Sky, Peach and Coral Red.

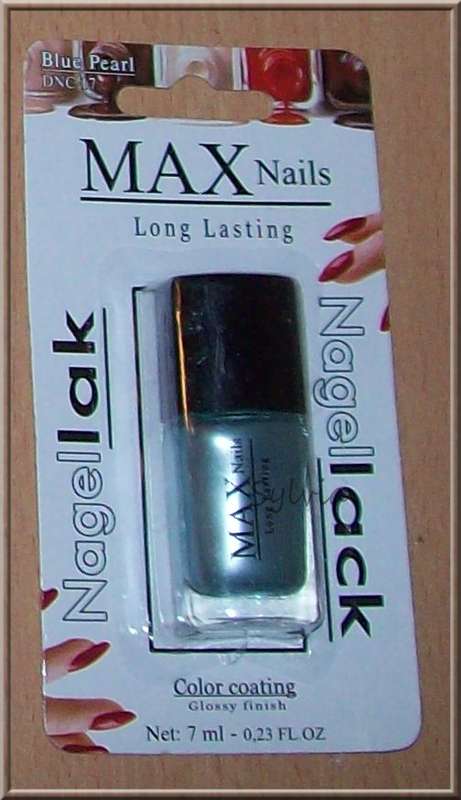
Hierboven kun je zien hoe de verpakking eruit ziet, linksboven zie je nogmaals de naam van het lakje staan (deze staat ook onderaan het flesje op een stickertje geplakt). Verder vind ik het wel makkelijk dat er een verpakking om zit, zo heb je toch 100% zekerheid dat niet ff iemand heeft zitten lakken met jouw nieuwe lakjes! Sommige namen vind ik trouwens een beetje gek, zo heet het oranje lakje bijvoorbeeld Coral Red, en het felroze lakje Peach..

Above you can see how the packing looks like, on the left side you can see the name of the polish (you can also read the name below the bottom on a sticker). I think a packing is really handy, now you now that nobody used the polishes before! Some names are a bit strange, who calls a polish Coral Red when it's orange? Or call it Peach while the polish is bright pink!?

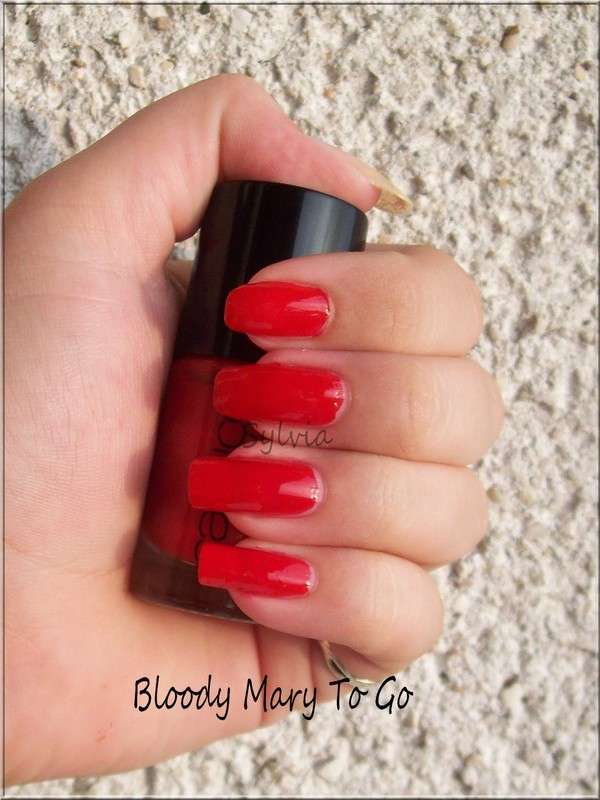
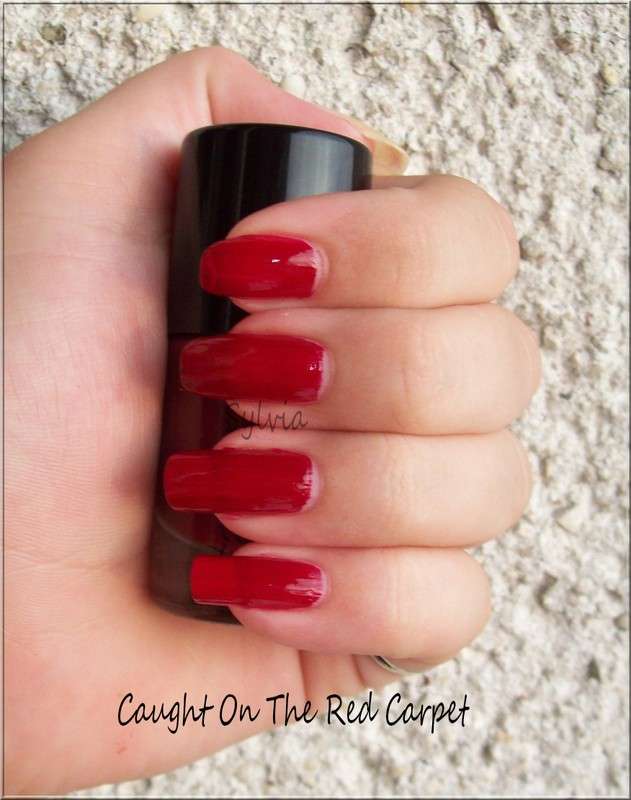
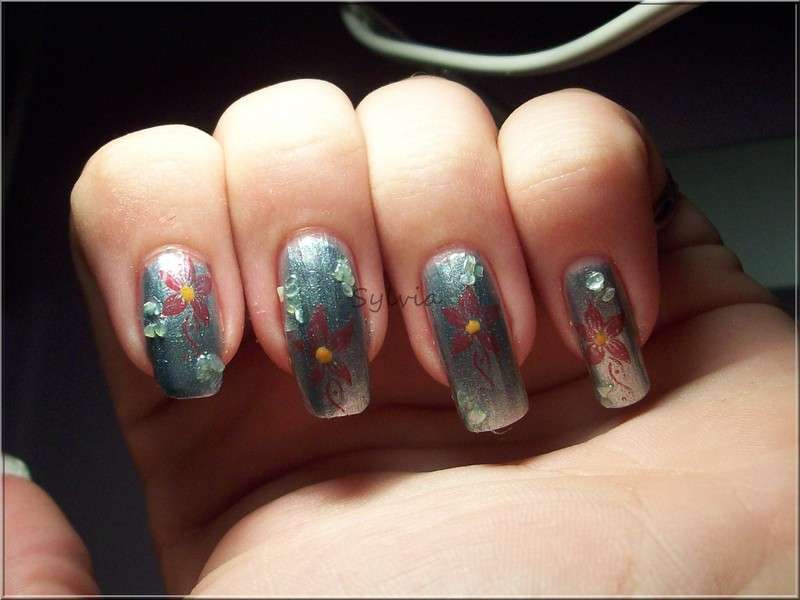
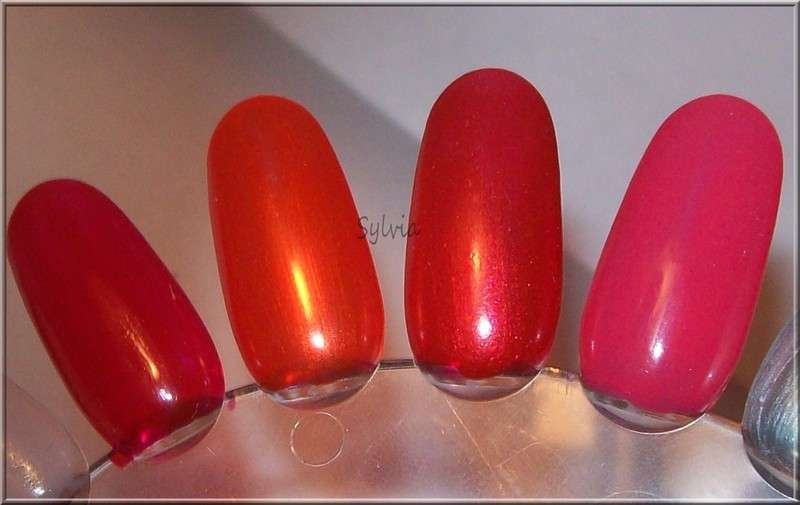
Hierboven Riviera Red, Coral Red, Rose Red en Peach op de wheels. Zo kun je een beetje de kleur zien die ervan af komt. Eigenlijk best goed! Na 2 laagjes krijg je al een mooi resultaat (De foto is niet helemaal kleurgetrouw trouwens). Aparte swatches van deze lakjes kunnen jullie binnenkort zien.

Above you can see Riviera Red, Coral Red, Rose Red and Peach on the wheels. Now you can see a bit of the colours. They're just fine! After 2 layers you have above result ( The picture isn't very good with the colours btw). Swatches on my nails are coming later.

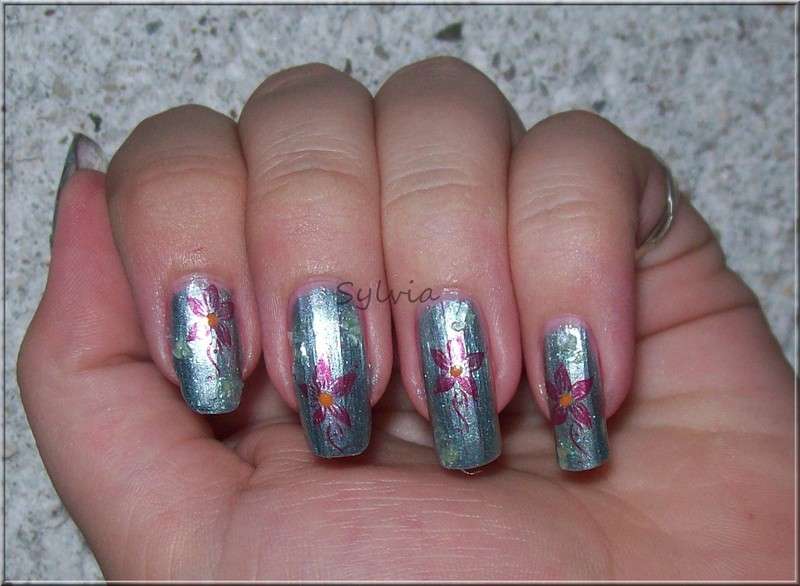
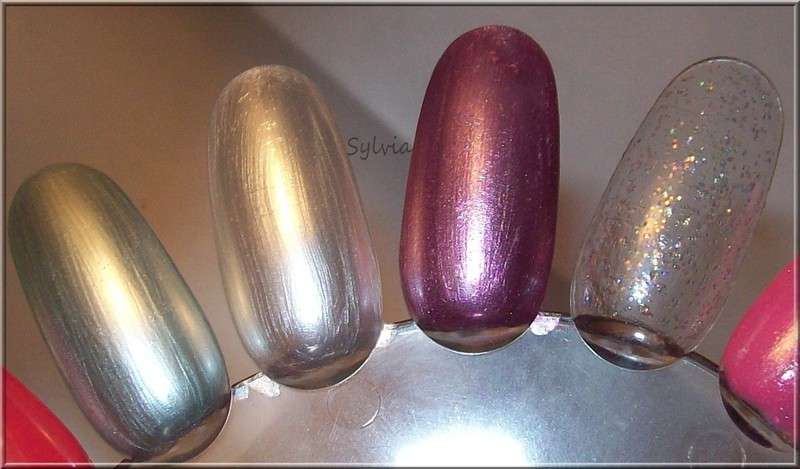
En hier zie je Blue Pearl, Pearl, Light Purple en Diamond Sky. Vooral de laatste komt niet mooi over op de foto, in Diamond Sky zitten heel veel verschillende kleuren glitters. Blue pearl en Pearl zijn zoals je kunt zien heel streperig, deze 2 zijn dus weer iets minder helaas. Light purple doet me trouwens aan een lakje van Essence denken.. Ook hier komen swatches op mn nagels later van.

And here you can see Blue Pearl, Pearl, Light Purple and Diamond Sky. Especially the last one is not nice on this picture, Diamond Sky has glitters in every colour! Blue Pearl and Pearl are very streaky, these 2 are less nicer polishes. Light Purple is a bit of a known polish, it looks a bit like a polish I have from Essence I think.. Swatches on my nails are coming later too.

Dus nog even alle voor en nadelen op een rijtje:/ So all the benefits and disadvantages:

Voordelen/Benefits
- Goedkoop/Cheap
- Goede dekking/ Opaque
- Handige verpakking/ Good package

Nadelen/Disadvantages:
- Sommige zijn wat streperig/Some of them are a bit streaky

Barst maar los wat jullie van deze lakjes vinden, ik ben benieuwd!/ Tell me what you think of these polishes!

Thanks for reading!

Superstar - Remember Me Red

Helloooo!Bit of a break in transmission, but we're getting down to the last month before Kaz and I head to Blighty so it's getting seriously busy, dudes.Anyway - quickly on with my samples of Superstar polishes, and my utterly un-photogenic nails! Honestly, I just look back at old photos of my nails on this blog and want to cry. They used to be so nice - now 6 months of peeling, peeling, peeling.

Monday, August 30, 2010

Handen oproepje!

Vandaag even een bericht geheel in het Nederlands, dit is namelijk een oproepje voor Berend.

Ik zal even uitleggen waar dit oproepje over gaat, Berend is bezig om het onderdeel Handmodelling meer bekendheid te geven, hiervoor is hij bezig met een portfolio met handen. Via hyves probeerd hij mensen te benaderen om mee te werken aan zijn portfolio. Voor meer informatie kun je ook zijn hyves pagina bezoeken!

Berends uitleg:
Hand Modeling: Hyves is een fantastisch medium om vrouwen te bereiken met als doel mijn portfolio zoveel mogelijk uit te breiden Op dit moment ben ik bezig met het opstarten van een Hand Modeling Agency. Ik heb gemerkt dat hier een markt voor is en heb veel contacten met diverse reclamebureaus. Om te slagen heb ik natuurlijk wel een uitgebreide en imponerende portfolio nodig!! Dit is de enige manier om indruk te maken in deze wereld. Dus heb ik jullie daarbij nodig!! Daarom schrijf ik ook via Hyves dames aan. Om een goed gevulde portfolio te krijgen ben ik op zoek naar dames die hiervoor haar "handen" willen laten zien. Help me AUB!!! stuur 2 foto's op van je handen: 1 van de buitenkant hand en een van de binnenkant hand (zie de voorbeeld foto's op mijn Hyves profiel) naar: berend2002@zonnet.nl Hoe meer foto's ik ontvang hoe groter de kans van slagen is voor mijn opzet Wie weet levert het jou dan wel een opdracht op?!!

Eigenlijk staat alles al uitgelegd in bovenstaand bericht. Ben jij dus iemand die trots is op jouw handen? En lijkt dit je wat? Berend is heel erg op zoek naar mensen die hieraan willen meewerken! Hieronder 2 voorbeeldjes van de foto's zoals hij ze wilt hebben:
De enige voorwaarden die hieraanvast hangen:

-Het liefst met egaal rode nagellak
-Vingers gespreid

Sunday, August 29, 2010

Notd: Half marble/half Konad

Laatst was ik wat aan het spelen met watermarble. Voorheen heb ik dat wel eens op een paar tips geprobeerd, maar had het nog nooit op mn eigen nagels gedaan. Ik wilde nu niet meteen voor een standaard design hele nagel met watermarble, dus heb er een halve watermarble en een halve Konad nagel van gemaakt!

So I was playing with the watermarble. A while ago I did it on some nailtips, but I've never done it on my own nails. So I decided to do something with watermarble, but didn't want my whole nail with watermarble, so I've choosed a half marble/half konad design!

Als basiskleur heb ik een witte lak gekozen, dit is La Femme Beauty - White. Echt een superdekkende witte tip-ex lak! Voorheen gebruikte ik altijd de white coat van de hema, maar deze is toch een stuk dekkender, en nog iets goedkoper dan die van de Hema.

The basecolour is La Femme Beauty - White. A lovely tip-ex white polish! Normally I use a white coat from Hema, but this one is much more opaque and cheaper.

Daarna heb ik dus al mn vingers afgeplakt met plakband, ik had geen zin in veel poetswerk dus vandaar de plakband. Ook heb ik een schuin deel van mn nagel afgeplakt (is niet te zien op bovenstaande foto). Vervolgens heb ik enorm veel lakjes uitgeprobeerd om mee te marblen, maar het lukte bij weinig lakjes. Deze 2 lakjes zijn beide van Catrice: It Blue My Mind en Hot or Not?. Bij mn middelvinger is iets fout gegaan, haha hier is de lak paars geworden? Ach het had wel iets aparts..

After the base I used a lot of tape on my fingers, didn't want to do a clean up, so that's why the tape is on my fingers. I taped half of my nail with tape, because I wanted a half marble nail (you can't see it very well on above pic). After that I tried a lot of polishes for the marbling, but not every polish is good for marbling. The 2 polishes I've used are both from Catrice: It Blue My Mind and Hot or Not? My middle finger is a bit strange, because the blue polish turned purple? Ah whatever, who cares..?

Na het verwijderen van de plakband zag het er dus zo uit. Het is wel te zien dat ik nooit marble ;)

After removing the tape it looks like this. You can see I'm not a marble person ;)

Na het verwijderen van alle tape heb ik op de nog witte delen van mn nagel een konad vlindertje gestempeld (dit vlindertje komt van de Essence plate, maar is officieel van Konad) de stempellak is GoldBlack van Konad. En dit was dus het eindresultaat.

After removing all the tape I stamped a konad butterfly on the white parts of my nail. The butterfly comes from a Essence plate, but originally is from Konad. The Stamping polish I used is GoldBlack from Konad. So this is the result.

Thanks for reading!

Saturday, August 28, 2010

HOW SWEET IT IS TO HAVE A JOB LIKE ME :)


tips How to Remove Acrylic Nails By Elizabeth Morgan

Acrylic nails are basically false nails that are applied onto one's real nails, with the help of some sort of enhancement material such as acrylic. They are considered to be very safe, provided the process is performed by a professional, who is aware of the latest techniques and methods.Many a times, people who go for acrylic nails face a number of problems when it comes to removing the nails,

Friday, August 27, 2010

Catrice Ultimate Nail Laquer Part 4

Vandaag deel 4 van de Catrice lakjes. De laatste 4 lakjes zijn toch wel een beetje de lakjes waar ik het minst positief over ben helaas, maar er zitten nog steeds wel leuke kleurtjes tussen! Ik heb nu 21 lakjes uit deze collectie, en weet dus ook niet of er nog meer bij komen, naar mijn gevoel heb ik de meest leuke lakjes wel gehad nu. Maar heb jij nou nog een ultieme favoriet die je nog niet voorbij hebt zien komen? Laat het me weten!

Today part 4 of the Catrice polishes. The last 4 polishes are mostly my least favorite, but some of these 4 are nice although! I've got 21 polishes from this collection so far, don't know if I'm gonna buy more, I think I've got the most nice polishes now. But do you have a favorite Catrice polish which you didn't see on my blog? Let me know!

De eerste is From Dusk To Dawn. Naar mijn mening echt een heel vies bruin modderkleurtje. Ik ben echt géén fan van bruin, dus vind deze lak ook echt niet mooi (smaken verschillen, misschien ben jij wel helemaal gek van deze lak?). Applicatie was ook anders dan normaal, vond hem een beetje aan de dikke kant waardoor het lakken wat moeilijker ging, wel een goed resultaat na 2 laagjes, dus dat valt verder wel mee. Één ding is in ieder geval zeker, ik zal deze lak niet vaak dragen!

The first one is From Dusk To Dawn. I really don't like this colour, it looks a bit like mud, and I really don't like braun polishes. (But everyone has their own taste, so maybe you like this polish a lot?). Application was a little bit hard, polish is a bit thick, so polishing wasn't easy. After all a good result after 2 layers, so not bad at all. One thing's for sure, I'm not going to wear this polish very often!

Het tweede lakje is Hot or Not? Een heel lief crème donkerroze kleurtje. Deze vind ik dan wel weer mooi! Roze staat vaak heel lief, en hier valt vast wel wat leuks mee te maken! Applicatie was bij deze wel weer prima, na 2 laagjes een mooi resultaat en geen dikke lak!

The second polish is Hot or Not? A very sweet dark pink polish with a crème result. I really like this colour! Pink is always sweet, and I think you can do a lot with this colour! Application was good, after 2 layers above result and no thick polish!

Het derde lakje is Bloody Mary To Go. Normaal ben ik echt een groot fan van rode nagellak, maar deze vond ik toch een behoorlijke tegenvaller. Applicatie was echt een probleem, de lak is ontzettend dun, en op bovenstaande foto 3 laagjes lak, en nog steeds is een duidelijke nagel erdoorheen te zien. Een beetje jammer, maar waarschijnlijk gaat hij wel mooi worden met een laagje witte nagellak onder deze lak.

The third polish is Bloody Mary To Go. Normally I'm a huge fan of red nailpolish, but this one was a bummer. Application was a real problem, the polish is really thin, on above photo there are 3 layers, and you still can see my nails through it. A little bit a disappointing, but maybe this one is pretty with a coat of white polish beneath it.

Het laatste lakje is Caught on The Red Carpet, een donkerrood kleurtje. Eigenlijk geldt voor deze lak hetzelfde verhaal als bij Bloody Mary To Go. Alhoewel ik nu naar deze foto kijk lijken mn nagels echt enorm smerig, nog erger dan bij Bloody Mary to go! Misschien deze ook maar eens proberen met een laagje wit eronder.

The last polish is Caught on the Red Carpet, a dark red polish. Actually this one is the same as Bloody mary To Go. But now I've looked to the photo, I'm a bit scared, my nails look really ugly with this one! Argh! Maybe I'm going to try this one with a white coat beneath it too.

Nou tot zover waren dit dus weer de Catrice lakjes, en ik ben echt benieuwd welke lakjes jullie favorieten zijn, en welke het wellicht nog de moeite waard is om aan te schaffen!

So far the Catrice nailpolishes, I'm really curious which one is your favorite, and which one I really have to buy!

Enjoy your weekend!

Thursday, August 26, 2010

Notd Blue

Vandaag weer eens een nieuwe Notd, een Notd die er opzich wel leuk uitzag, maar ontzettend onhandig was! Maar dan ook écht heel onhandig, lees verder om te zien wat ik bedoel!

Today a new Notd, a Notd which looks good, but was really unhandy! Read further to know why!

Als basiskleur heb ik een lak van Casuelle gebruikt, deze lakken hebben dus geen namen of nummers, maar dit is een blauwe lak met een foil finish. De flesjes hebben een beetje een apart ontwerp, ze zijn aan de platte kant en de buitenkant heeft een beetje de kleur van de lak zelf, met een spiegeleffect. Je kunt jezelf dus zien in het flesje, handig omdat een spiegeltje altijd makkelijk is, onhandig omdat dit op foto's ontzettend reflecteerd! Binnenkort een post met de overige 4 lakjes van deze collectie van Casuelle.

For the base I've used a colour from Casuelle, as you know these polish don't have any names or numbers, but this one is a blue polish with a foil finish. The bottles are a little bit different, they are a bit flat, and the outside is a bit like the colour inside, with a mirror on it. So you can see yourself in this bottle, it's handy because a mirror is always handy, but unhandy to make pic's with. Soon there's gonna be a post with the other 4 Casuelle polishes from this collection.

En dit is de Notd, de stempellak is wederom weer Catrice - Let's talk about Barrie! (Echt een héérlijke kleur om mee te stempelen!). De bloem komt van een Fauxnad plate. In het hart van de bloem heb ik zelf een stipje gezet met een oranje lak van Essence. En dan komen we nu bij het onhandige deel. Op bovenstaande foto zie je vaag een aantal opliggende dingetjes. Dit zij gecrushte schelpjes uit één van de potjes met nailart. (Zie dit artikel). Echt ontzettend onhandig deze dingen! Ze liggen heel oppervlakkig op de nagel, en hebben hele scherpe randjes. Je blijft dus én overal achter hangen én je kunt jezelf hiermee verwonden (ja dat gebeurd echt!).

And this one is the Notd, Stampingpolish is again from Catrice - Let's Talk About Barrie! (Really a nice colour to stamp with!) The flower is from a fauxnad plate. The dot in the heart of the flower is a Orange polish from Essence. Now the unhandy part.. As you can see there are a sort of things on my nails. These are yellow crushed shells from one of the nailartpots. (Read this article). These are really unhandy! These are superficial on your nails, and have really sharp edges. So you stick on everything ánd you can hurt yourself because of the sharp edges. (Yes it really happens!)

Op bovenstaande foto kun je de gecrushte schelpjes iets beter zien. Ik raad je echt af om dit soort dingen als nailart te gebruiken op je nagels, het werkt echt heel lastig!

On above photo you can see the crushed shells better. I strongly advise not to use this kind of nailart on your nails, it's really unhandy and not nice to work with!

Thanks for reading!

Wednesday, August 25, 2010

How to Remove Acrylic Nails(how to remove acrylic nails)

 How to Remove Acrylic Nails


When most people think of  How to Remove Acrylic Nails, what comes to mind is usually basic information that's not particularly interesting or beneficial. But there's a lot more to  How to Remove Acrylic Nails than just the basics. 

You may not consider everything you just read to be crucial information about  How to Remove Acrylic Nails. But don't be surprised if you find yourself recalling and using this very information in the next few days. 

Acrylic nails are basically false nails that are applied onto one's real nails, with the help of some sort of enhancement material such as acrylic. They are considered to be very safe, provided the process is performed by a professional, who is aware of the latest techniques and methods.

Many a times, people who go for acrylic nails face a number of problems when it comes to removing the nails, once they have served their purpose. It is very important to be aware of the correct way to remove the acrylic nails; otherwise there is a possibility that one may severely damage his real nails.
A very popular, cheap and effective way of removing the acrylic nails is to use acetone. One must buy pure acetone, which is easily available from any store that sells regular nail polish remover. The nails should then be clipped as far as possible. Now the elaborate method is as follows.

Take some aluminum foil and cut it into squares. Now, wet the cotton balls with acetone, lay it on the nail and cover it as tightly as possible with the aluminum foil. Repeat the procedure for all 10 nails or do one hand at a time. Do not open the foil for at least 20 minutes. Once the time elapses, remove the foils one at a time and with a wood pusher or orange wood stick scrape the acrylic off. Ideally it should come right off, however the process can be repeated if there are some traces left. Another way of removing the nails using acetones is to soak the hands in warm water for some time. Then soak them in acetone and the acrylic nails will then become soft and easily remove.

It is very important to remember that once the entire process is over, one should massage the hand with a good hand cream as the acetone can thoroughly dry the skin.
Now you can be a confident expert on  How to Remove Acrylic Nails. OK, maybe not an expert. But you should have something to bring to the table next time you join a discussion on  How to Remove Acrylic Nails.

How to Remove Acrylic Nails

Meet me at Coral Island/I Scream Peach Comparison

Na een tijdje weer eens een nieuwe comparison, laatst liet ik de lak Meet me at Coral Island van Catrice al zien, en er waren toen meiden geïnteresseerd in een vergelijking met I Scream Peach. Dus bij deze de vergelijking! Ik ben alleen een beetje stom geweest en ben vergeten een foto van de flesjes te maken, maar deze wordt zo snel mogelijk in dit bericht gezet!

After a while, today another comparison, a while ago I showed you Meet me at Coral Island from Catrice, and some girls wanted to know the different between this polish and I Scream Peach. But I'm really stupid,, Forgot to make a bottlepic, but really soon I'll put it in this post!


De eerste foto is binnen gemaakt, zonder lampen, dus gewoon in het daglicht maar wel binnen. De tweede foto is buiten gemaakt, zonder zon want deze was er op dat moment helaas niet. Op de wijs/ringvinger zie je Catrice - I Scream Peach, en op de middelvinger/pink zie je Catrice- Meet me at Coral Island. Zoals je al kunt zien zijn dit absoluut geen dupes, er zitten duidelijke verschillen tussen deze 2 lakjes.

I Scream Peach is duidelijk zichtbaar een stuk lichter dan Meet me at Coral Island. I Scream Peach is dus ook meer een perzik kleurtje, Meet me at Coral Island neigt meer naar de rood/oranje kant en krijgt daarmee dus meer een koraalkleur.

De substantie is van beide lakken hetzelfde, ze lakken beide even goed, en voor beide lakjes heb je 2 laagjes nodig. Twijfel je over 1 van deze lakjes? Kijk dan goed welke kleur jij mooier vind en welke kleur er beter bij je past. Maar let er wel op, I Scream Peach is dus bijvoorbeeld geen goede vervanger voor Meet me at Coral Island.

The first photo is made inside, without lamps, but inside. The second photo is made outside, without sunlight, because there was no sun. At Index/ringfinger you can see I Scream Peach, at the middle/pinkie you can see Meet me at Coral Island. As you can see, they're absolutely no dupes!

I Scream Peach is way lighter, this one is more peachy. Meet me at Coral Island is a bit darker and more red/orange, or just a coral colour.

Application from both polishes are the same, really good, and for both polishes 2 layers of polish. Do you want one of these colours? Look really good at the colours, which one do you like the most, and which one fits better by you're skin. But make sure: I Scream Peach is nó dupe of Meet me at Coral Island.

Thanks for reading! Enjoy your day!

Tuesday, August 24, 2010

Taste of Victory

Hello my Sweet Nail-Art Lovers
I call this manicure Taste of victory because it seems like we won.... Long story short is that Diana from Painted Lady Fingers have notified me that someone stole my header and all the content of my blog together with hers and some other fellow bloggers.
We collectively contacted blogger team and it seems like they just turned down a scam blog.
Oh, gosh that feels good to know that blogger team is on our side and help protect our blogging initiative copyrights.
So this is the manicure to celebrate our little victory.
My only hope is that scam blog will stay down from now on.

This is my right hand, to eb honest i like this one even better :)

Sunday, August 22, 2010

I LIKE IT, I LOVE IT, I WANT SOME MORE OF IT!

Everytime I have leftover glitter pieces or mylar that I'm too lazy to put away I put them in an extra drawer I have. On these nails I took out all of my "leftovers" and put them randomly onto black acrylic. Soooo fun! I may have to do this more often. You just never know what you're going to get.

This is an opi gel polish design. I layered Happy Anniversary over Russian Navy. I also added little silver glitters for some bling. Everyone loves a little bling!

This client wanted red, white, black and fun. We both have a wild crazy creative side. So this is what we came up with. It is the perfect nail marriage. Thanks for saying, "I do!"

This client told me she's not too crazy about red after I did her nails.... oops my bad. Hopefully she still likes them. I must try harder to remember what each client likes and dislikes.

These are my nails. I didn't do them but hey they are fabulous so I still had to show them off!

On these nails I used xxx white acrylic from Young Nails. No marbling with the white at all which I loved! Anything to make it look like I'm a better nail tech than I really am. I added clear sequins and little clear glitters all over. They are very bling! Love them.

A crazy design for a crazy client what more can I say? LOL

Have I already posted a picture of this same design? I don't know I have done too many nails! I wanted to show the light lavender dots that I have just incase I haven't shown them before. They are from oaktreedollshouseminiatures.com

This is a design I did with gel polish. The flowers are stickers and I painted the polka dots on.

I love a white french manicure with a little surprise... a litte twist.

4 Things Tag

De lieve Floor & Marjolein hebben mij getagged! Dus bij deze the 4 Things Tag! / The always nice Floor & Marjolein tagged me! So here is the 4 Things Tag!

4 things in my bag/purse:

-Portemonnee/Wallet
-Mobiel/Phone
-Deodorant/Deodorant
-Sleutels/Keys

4 things found in my office desk drawer:

-Make-up/Make-up
-Haarproducten/Hair products
-Maskertjes/ Facemasks
-Verzorgende nagellakjes/ Base-topcoat etc

4 favorite things in my room:

-Natuurlijk mn kast met nagellak/ All my nailpolish
-Wekkerradio (heb een hekel aan niet weten hoelaat het is :p)/ Clock
-Tv
-Laptop

4 things I’ve always wanted to do:

-Wereldreis maken/Trip around the world
-Nagelstyliste worden/ Becoming a nailartist
-Een eigen huisje krijgen (over een tijd pas hoor :p)/My own home
-Verdergaan met waar ik al mee bezig ben/ Doing what I used to do

4 things im currently into:

-NailartCreations bijhouden/ Blogging on Nailartcreations
-Nagels lakken/ Polishing my nails
-Foto's maken/ Make Pictures
-Op zoek naar nieuwe blogs om te volgen!/ Finding new blogs!

4 things I bet you didn’t know about me:

-Mn kamer is áltijd een troep/ My room is always a big mess
-Ik háát stofzuigen/ I hate vacuuming
-Heb een hekel aan lelijk gelakte nagels/ Ugly polished nails
-Rammstein luisteraar :)/ Big fan of Rammstein

4 songs I can’t get out of my head:

- Rammstein: Ich Tu Dir Weh
- Rammstein: Weidmann's Heil
- Metallica: All Nightmare Long
- Bullet For My Valentine: Hands of Blood

Ik tag:

- Kim
- Mysterious Brunette
- Ladybug
- Beautyblogt

Saturday, August 21, 2010

2010 Ducati Hypermotard 1100 EVO SP

2010 Ducati Hypermotard 1100 EVO SP Front Angle View2010 Ducati Hypermotard 1100 EVO SP Front Angle View

2010 Ducati Hypermotard 1100 EVO SP Motorcycle2010 Ducati Hypermotard 1100 EVO SP Motorcycle

2010 Ducati Hypermotard 1100 EVO SP Photos2010 Ducati Hypermotard 1100 EVO SP Photos

2010 Ducati Hypermotard 1100 EVO SP Sports Bike2010 Ducati Hypermotard 1100 EVO SP Sports Bike

2010 Ducati Hypermotard 1100 EVO SP Rear Angle View2010 Ducati Hypermotard 1100 EVO SP Rear Angle View